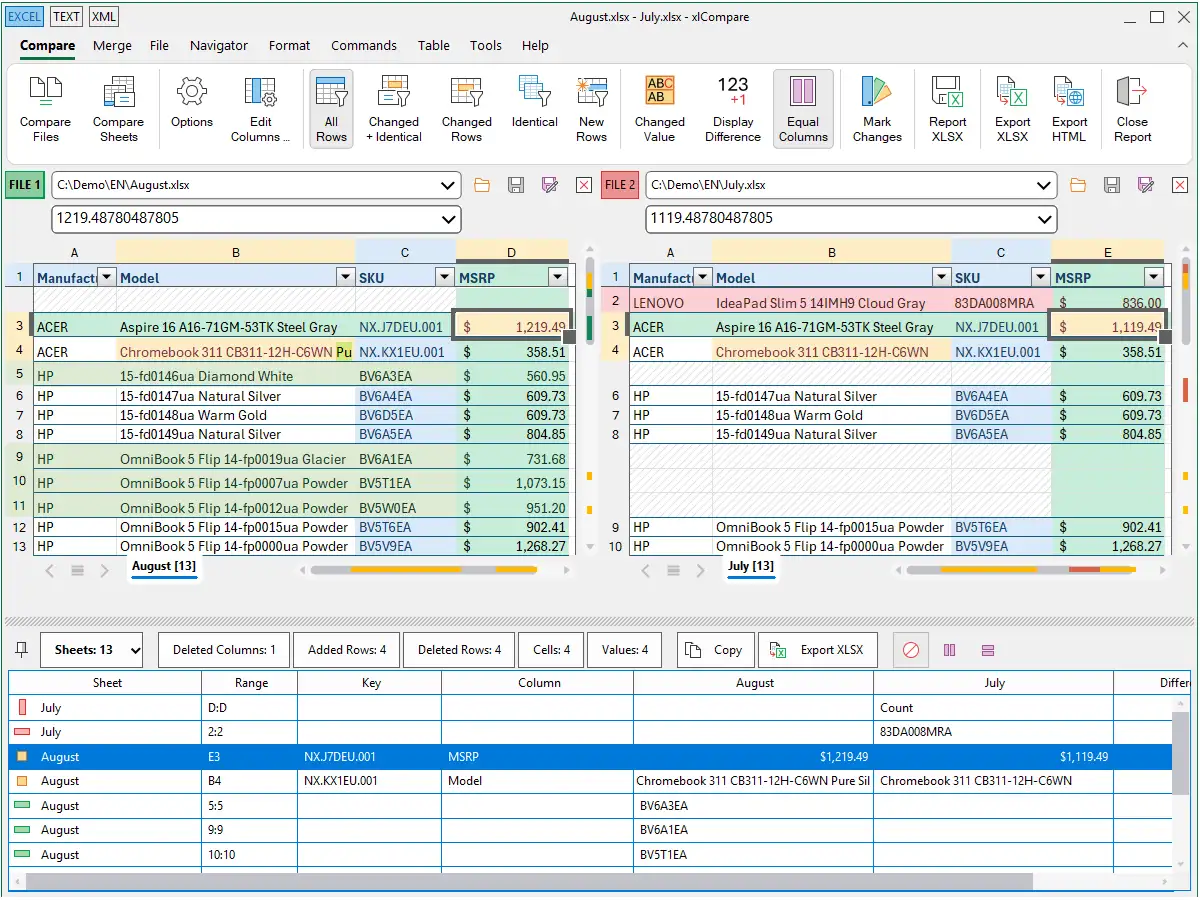
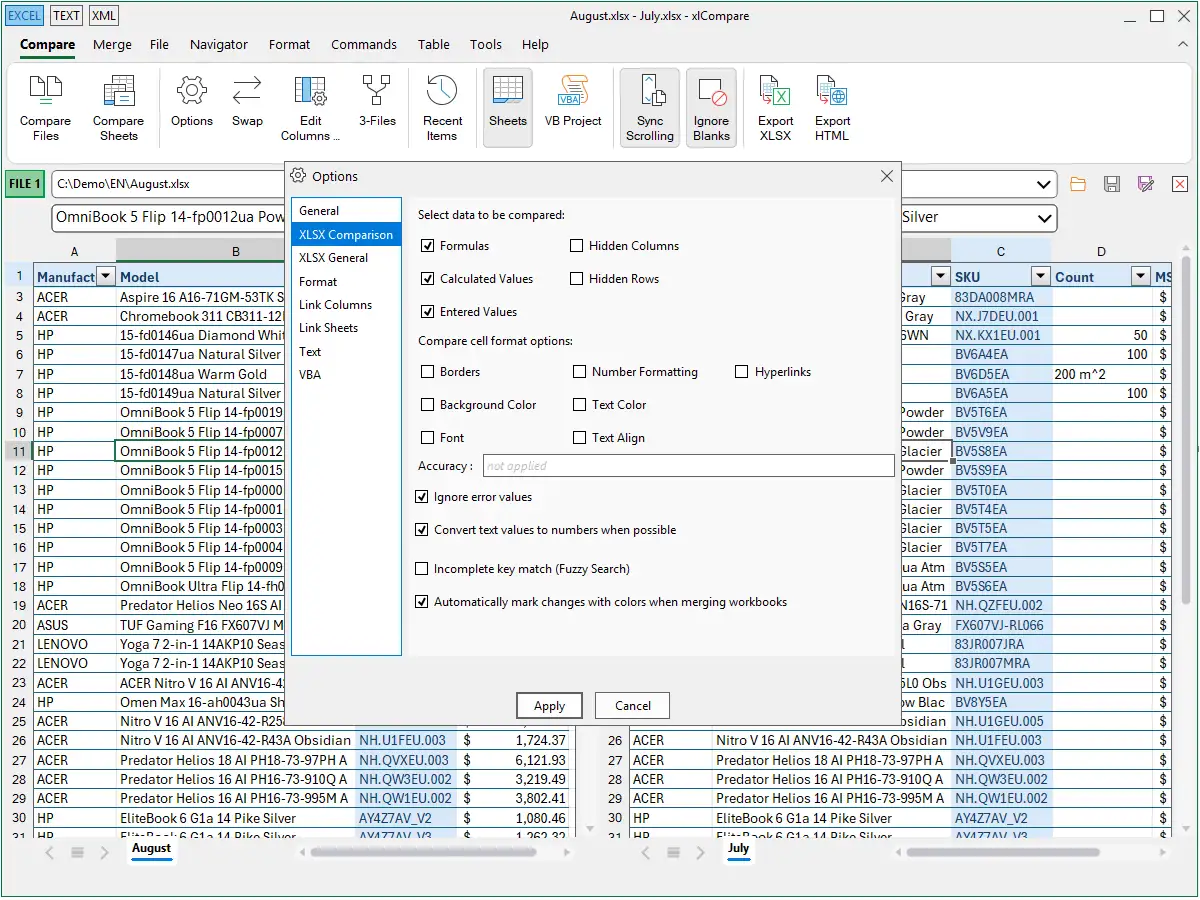
Compare Excel Files
Highlight all changed cells and inserted rows automatically. No formulas. No Power Query. No manual work.


Download and Install xlCompare
xlCompare is the best desktop solution to compare Excel files. Install xlCompare on your PC to compare your spreadsheets privately. xlCompare is a portable application, enabling fast private comparison of Excel files directly on your computer.
Build Date:
Version:
Name:
Full Path:
Size:
Publisher:
Evaluation Period:
Get xlCompare from the Microsoft Store
| Web Store URL | https://apps.microsoft.com/store/detail/XP9KKBZRRPTJ0D |
| Store deep link | ms-windows-store://pdp/?productid=XP9KKBZRRPTJ0D |
Evaluation version is fully-functional. Its working period is limited to 15 days. So you can see how our product works for you. This helps you to decide if you need a dedicated professional tool to compare Excel and CSV files.
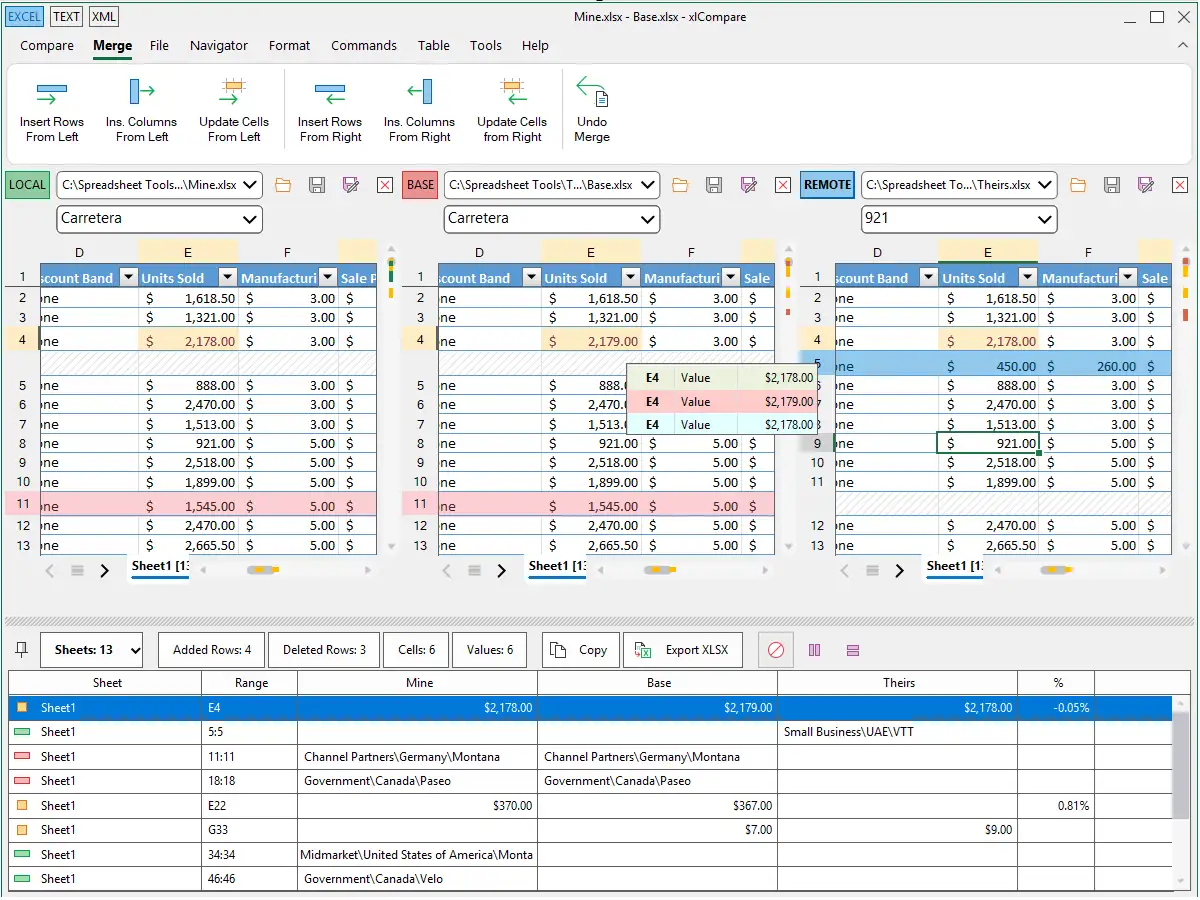
Diff viewer for XLSX files stored in GIT
Integrate xlCompare with your source code control application to compare different revisions of the XLSX, XML and TEXT files. Excel files are binary files and can't be processed with a text diff tool. Comparing two or three text files is much more trivial than comparing spreadsheets. xlCompare Professional has 3-way file comparison and automatic merging for Excel files. If you are Game developer and you are using Unreal Engine or Unity - xlCompare will help you to manage XLSX files you keep under version control.
Your Excel file was modified by a colleague? Compare LOCAL, BASE and REMOTE versions of the file to resolve merge conflict.
How to keep and review all the revisions of your XLSX file? Read this instruction if you are using GIT in your development process.
How to use xlCompare with Perforce (P4V)
Perforce is your source control app? Connect xlCompare with Perforce with view and merge commits in your XLSX files.
SVN is a common tool for version control. This step-by-step quide will help you to integrate xlCompare into your SVN client tool.
Use xlCompare to compare and merge XLSX, XML and TEXT files with Command Line Interface.
Best Tool for Teams and Developers
What are the advantages of xlCompare?
![]()